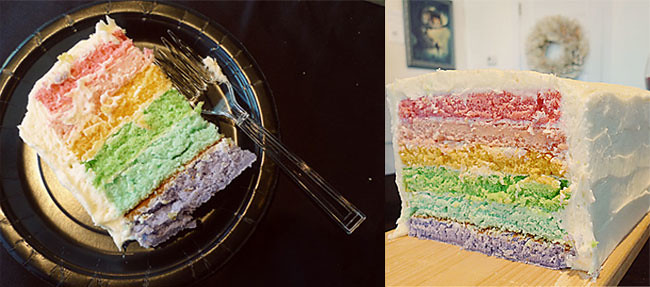
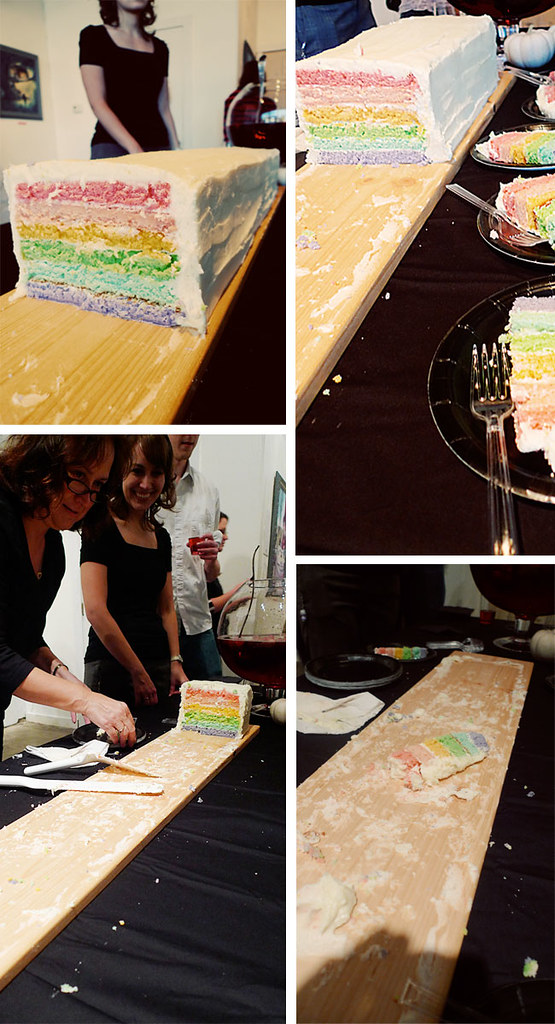
The rainbow cake for the show was officially a hit! 6 inches wide, 6 inches high, and about 40 inches long... that's a lot of cake. It fed about 200 people. Here it is gradually disappearing...
Apparently it was plate-lickin' good.
So you want to make it too? Well, get ready for some work...
The recipe I used was for a pound cake. This worked well because it's a dense and heavy cake, able to support such gigantic proportions. If you have a recipe you'd rather use, go for it, you can still follow my basic proceedure.
Sour Cream Pound Cake
1 c. sour cream
1/4 tsp. baking soda
2 sticks unsalted butter, softened
3 c. sugar
1 tsp. vanilla
6 eggs
3 c. flour
In a small bowl, combine sour cream and baking soda, mix well and set aside. In a large bowl, cream butter, sugar and vanilla. Beat in sour cream mixture. Add 2 eggs alternately with 1 c. flour, repeat 2 more times. If desired, tint with food coloring. Pour into a greased and floured pan, with the bottom lined with parchment paper. Bake at 325 degrees.
Baking times will vary based on the pan you are using. I made my layers in cookie sheet / jelly roll pans, and they took about 25 minutes to test done. Deeper pans may take up to an hour, but the cake is done when you insert a toothpick and it comes out clean.
1. I used Wilton gel food coloring to tint my batter. I made 6 layers, so 6 batches, and 6 different colors. Make as many batches of cake as necessary to complete the size cake you desire.
2. Make sure you grease and flour well, and don't forget the parchment paper. Once the cake comes out of the oven let it cool for about 10-15 minutes. Run a knife along the edge to loosen. Lay a sheet of wax paper over the cake top, then gently flip over. I flipped mine out onto vinyl placemats, it was the only thing I had that was large enough. If the cake is sticking a little, tap on the pan, and try prying a knife at the corners. Let cool completely.
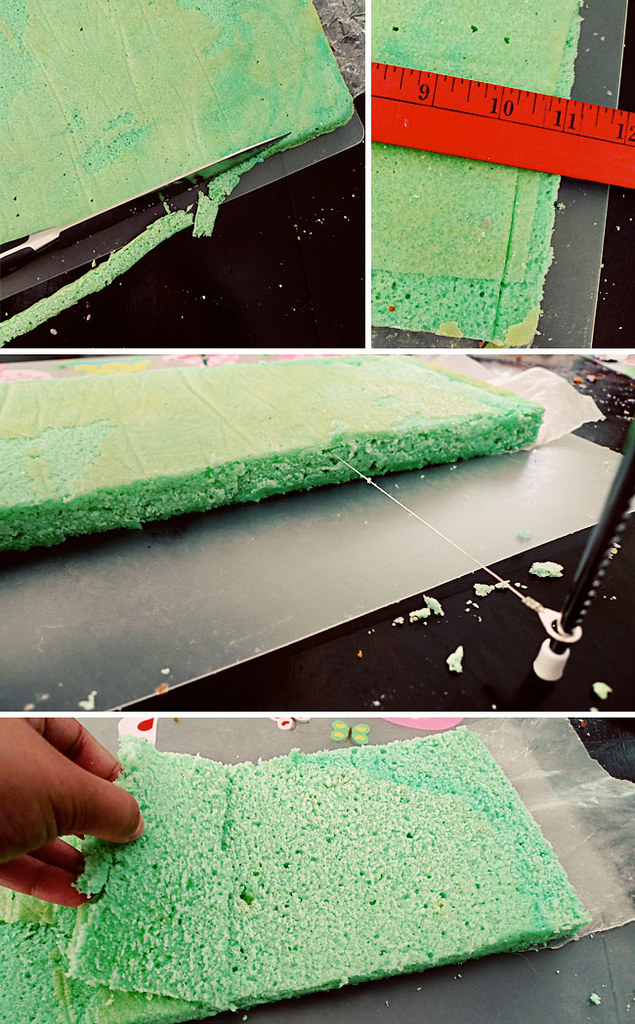
3. Once all your layers have been baked and cooled, it's time to prep the layers. First, trim all the edges so you have a nice crisp edge.
4. If you're making a long rectangle cake like me, you'll need to trim the layers down to size. 1 jelly roll pan makes 2 long rectangle sections, so 2 cake blocks. I made the layers using 3 different pans, so I had to trim them all to a standard size. For me, that was 5.25" x 18". Use that wax paper under the cake to carefully separate and transfer the layers (give it a good run with a knife, and it will tear perfectly to separate).
5. You must level the layers. If you skip this step, your cake will be slanted and lack good even edges. Using a gentle slicing motion, slide the leveler through the cake at a height that will work for all the layers. If you don't want to spend $2 on a cake leveler, you can use a serrated knife, I'm just not able to get it perfectly even that way. Once you've sliced through the top of the layer, just fold back the cut portion and remove. Warning: By this point, there will be cake crumbs everywhere. You'll just have to deal with, it's going to get worse before it gets better.
6. Once you've prepped all the layers, you can begin assembling. You'll need plenty of frosting, I used 2 batches of Best Buttercream. Begin by setting your first layer down on a large flat surface, for me, a placemat.
7. Spread a thin layer of frosting on top of the cake. I didn't want thick layers of frosting in between all the layers, so this thin layer just acts as glue, holding the next layer in place.
8. Carefully set the next layer on top. I found the best method to transfer the unwieldy pieces was to stand it on on it's side, then flip onto the top. If you can any cracks, do not fear. There's enough cake surrounding it to hold it together. I even had one break in half, but it held together fine with a little frosting. Continue with the thin layers of frosting and cake layers until you are done.
9. Now that you're all stacked, it's time to crumb-coat. Apply a thin layer of frosting all over the exposed surfaces of the cake. This seals in the cake and the crumbs so that you can apply the final frosting with ease.
10. If you're making a long rectangle cake like me, you have to repeat the layering and frosting process for your second cake block. Once everything is done and crumbcoated, stick it in the freezer for 2 hours. This will set the frosting and firm up the cake layers so you can handle and/or transport it.
11. Place the cake on your desired serving platter. For the long cake I made, I used piece of untreated pine, cut to 1"x 6" x 42", sanded, and sealed with butcher block wax. I placed my 2 cake blocks end to end on the board to form one continuous cake.
12. Frost away! My long cake took about 6 batches of Best Buttercream.
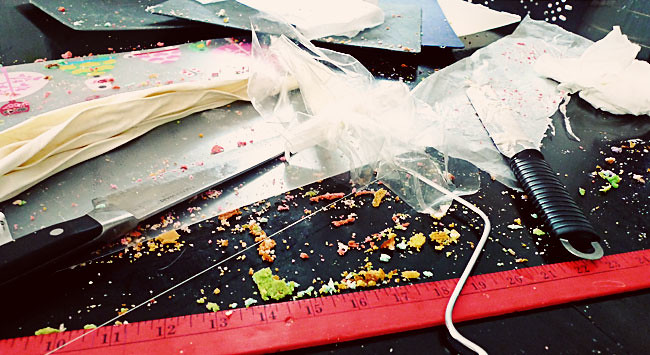
Enjoy! Watch for the look of delight when you cut into the cake and the rainbow is revealed, people will go nuts for it. Enjoy the glory and try to forget that your kitchen looks like this:
Recent Posts


14 comments:
Thanks for the how-to! Now, I must find somewhere to go where I can make this gorgeous cake...
This cake is amazing...thanks for including your recipe and process!
Hi Erin, Today I made a rainbow cake following your directions. I saw your post back when it was new, and have been waiting for an occasion worthy of the time it would take to make the cake. Such an occasion presented itself AND I had time to work on cake construction today. I love the results, and am sure it will be a big hit at my gathering. Thanks for the directions!
Some loan companies charge you you extra in the event you pay the balance of financial loans early on, for example
payday loans no credit check.com
they’re able to avail anything from 1,000 to 25,000.
e cig reviews, electronic cigarette, electronic cigarettes, best e cigarette, e cigarette, smokeless cigarettes
ralph lauren polo
oakley sunglasses sale
canada goose uk
bottega veneta outlet
tory burch outlet
cartier outlet
fitflops sale clearance
tiffany and co
polo ralph lauren
toms outlet
chanyuan2017.01.17
louboutin
oakley sunglasses
nike store
jordan 6
lebron shoes
new balance trainer
burberry outlet
nike air max
cheap eyeglasses
skechers shoes
2018.4.27xukaimin
asics trainers
reebok shoes
michael kors uk
para jumpers
clarks shoes
herve leger dresses
adidas zx flux
ferragamo
air max
timberland shoes
2018.6.5xukaimin
huf clothing
chrome hearts jewelry
champion clothing
nike shoes
marc jacobs bags
onitsuka tiger shoes
babyliss pro nano titanium
prada sunglasses
jordan 3
james harden jerseys
chenlina20180614
Air Max 270
Jordan Retro 11
Red Bottom Shoes For Women
Pandora Jewelry
Kyrie Shoes
Jordan 11
Pandora Outlet
Pandora Jewelry
Yeezy boost 350 v2
Ryan20190108
Hi I want to talk about one site fantastic online casino sites there I spend all my free time there I spend all my free time and get a small income
Pandora Jewelry Official Site
Pandora Official Site
Jordan Retro 11
Yeezy boost 350 v2
Nike Air Max 270
Kyrie 3 Shoes
Pandora Jewelry Official Site
Kyrie Shoes
Air Jordan Retro 11
Ryan20190323
I thank you for the information and articles you provided
One of the best articles that I’ve read in a very long time! I Took notes and surely gonna implement and test bunch of stuff you talked about.
You’re a beast! Cheers, Ash
And don't forget to visit Besttoolsbrand
Post a Comment
Hello there! So nice to see you.